Render Fun tutorial series · Lesson 2 / 10
Render Fun Tutorial 2: A Tour of the Interface, What Is Where and How to Use It
Knowing where things are is half of rendering fast. This lesson walks through the whole Render Fun window, so you always know which panel holds what and which button does what.
The three parts of the window
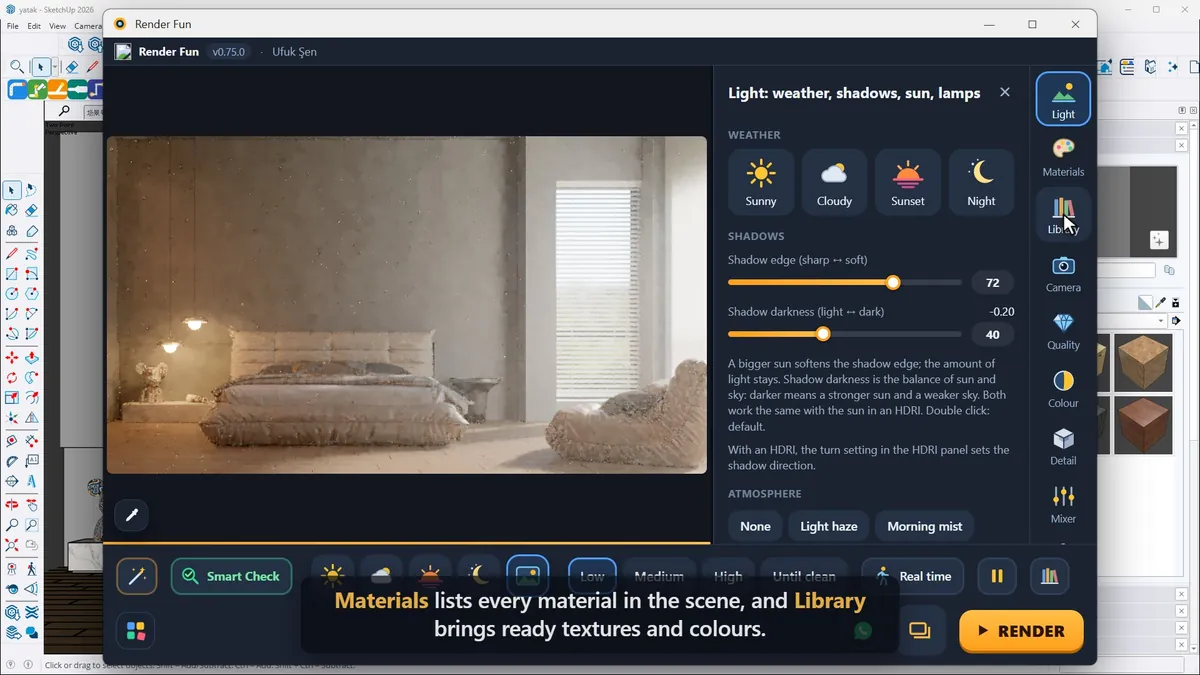
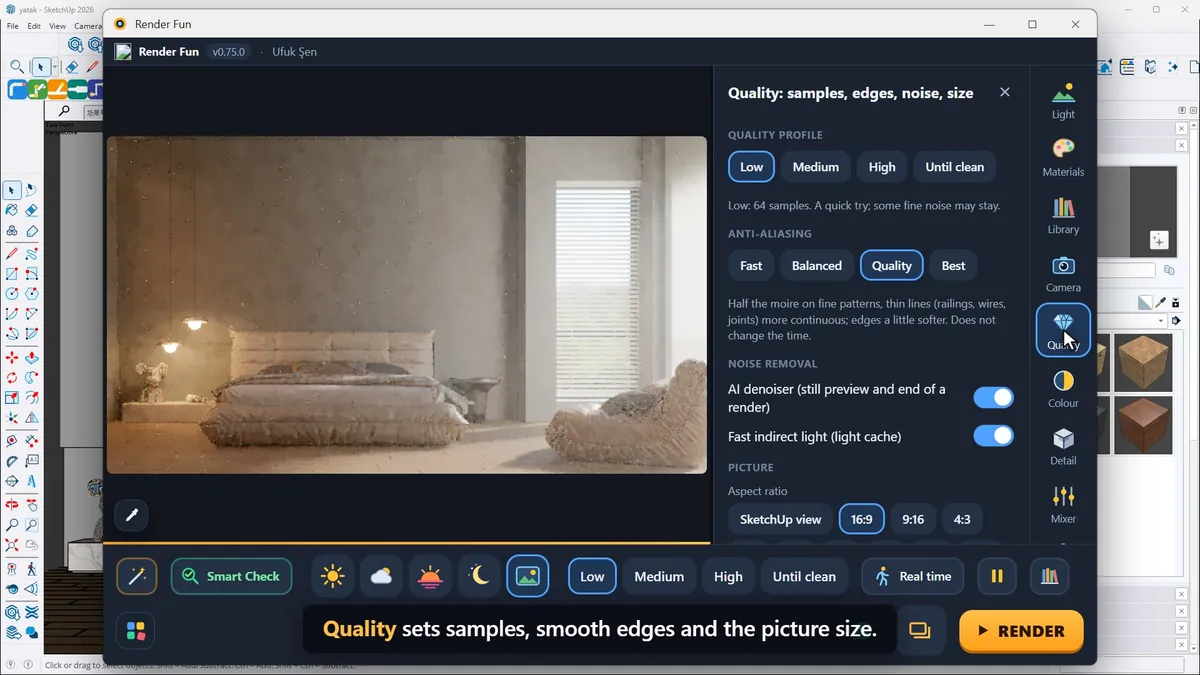
The Render Fun window floats next to SketchUp and has three parts: the live picture in the middle, the icon strip on the right and the action bar along the bottom. Each icon opens a panel beside the picture, never on top of it, and Esc closes the panel to give you the full picture back.
The side panels
- Light: the weather, shadows, the sun and lamps.
- Materials: every material in the scene; Library: ready textures and colours.
- Camera: framing, depth of field, panoramas and animation.
- Quality: samples, smooth edges and the picture size.
- Colour and Detail: the final look; they work instantly, even on a finished render.
- Mixer: dims or boosts the sun, the sky and the lamps separately.
- Settings: the language, saving and your own presets.
Every slider has a value box from 0 to 100: drag the slider or click the box and type. Double-click a slider to set it back to its default.
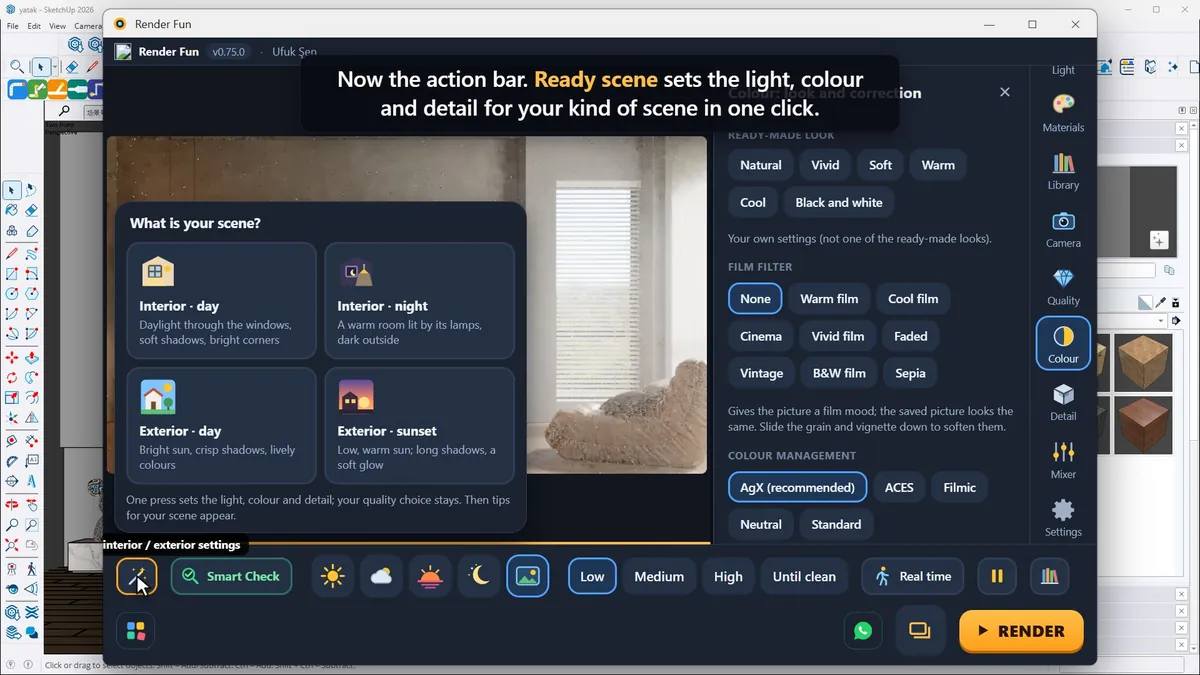
The action bar
- Ready scene: sets light, colour and detail for your kind of scene in one click, then gives tips for it.
- Smart Check: scans the model for problems such as leftovers of other render engines, empty objects or reversed faces.
- Weather and quality buttons, as in lesson 1.
- Real time: a smooth walk-through with W, A, S and D; drag the mouse to look around. Switch it off for the best, ray-traced RENDER picture.
- Pause: freezes the live picture so your graphics card can rest.
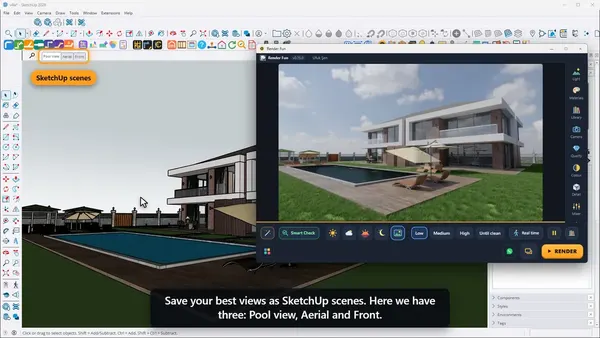
- All scenes renders every SketchUp scene in turn; RENDER makes the final picture.
Three keys to remember
R to render, P to pause or go on, Esc to close a panel. Scroll over the picture to zoom in and check details; double-click to see the whole picture again. The question mark at the foot of the icon strip opens the user guide, and the language button switches between English and Turkish.
Next: Lesson 3, camera, framing and composition.
Frequently asked questions
How do I close a panel in Render Fun?
Press Esc, or click its icon again.
What is the difference between Real time and RENDER?
Real time is a fast walk-through for finding the view; RENDER gives the best, ray-traced picture.
- 1. Install and first render
- 2. The interface: what is where
- 3. Camera and composition
- 4. Sun, sky and HDRI
- 5. Materials
- 6. Lights and the light mixer
- 7. Quality, noise and resolution
- 8. Colour, detail and final look
- 9. Plants, water and atmosphere
- 10. Final output and workflow