Render Fun tutorial series · Lesson 10 / 10
Render Fun Tutorial 10: Final Output, 360° Tours, Animation and a Professional Workflow
In this last lesson your renders become finished deliverables: panoramas, tours, animations, masks and Before / After videos, followed by one simple, professional workflow that puts the whole series together.
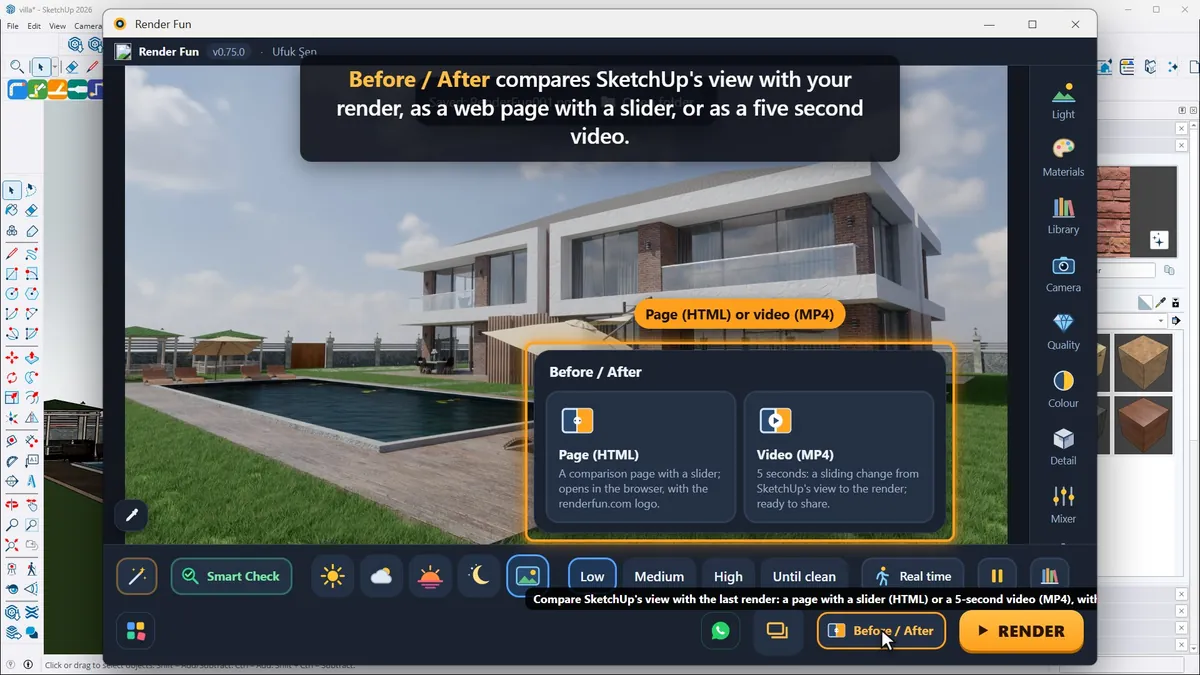
Before / After
Before / After compares SketchUp’s view with your render, as a web page with a slider or as a five-second video. Both carry a small logo and are ready to send to a client or post online.
360° panoramas and the panorama tour
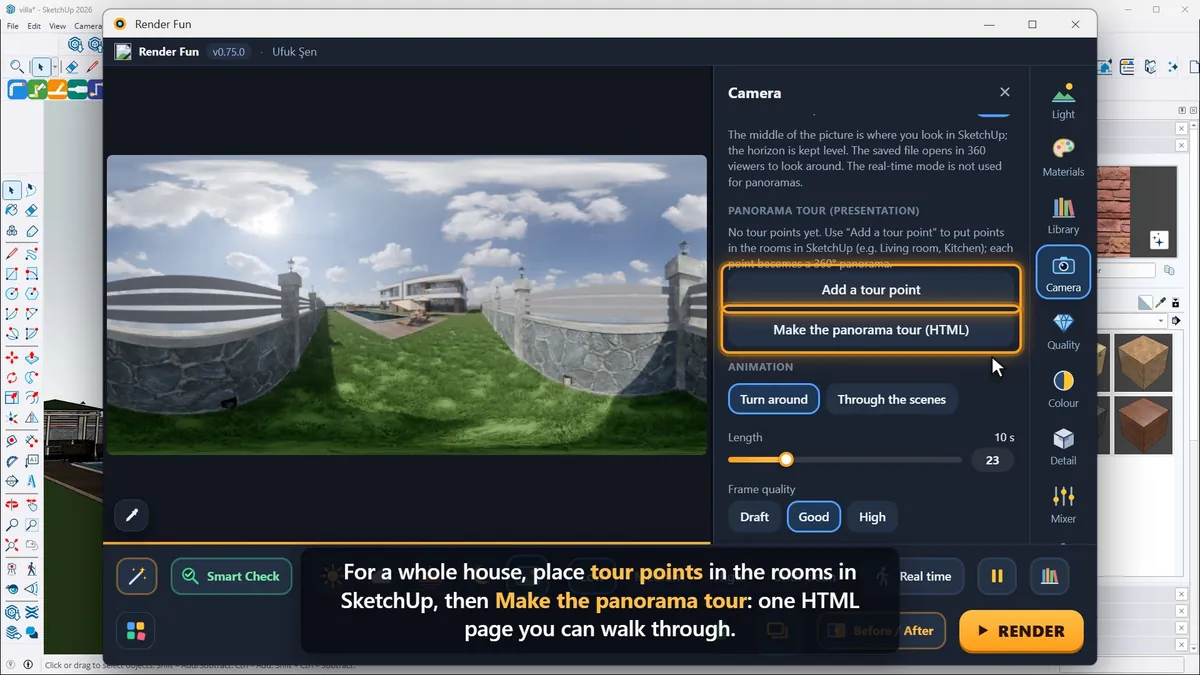
A 360° panorama shows every direction from the SketchUp eye point; switch it on in the Camera panel. The picture becomes a 2:1 panorama that opens in 360 viewers and VR headsets. For a whole house, place tour points in the rooms in SketchUp, then "Make the panorama tour": one HTML page you can walk through.
Animation
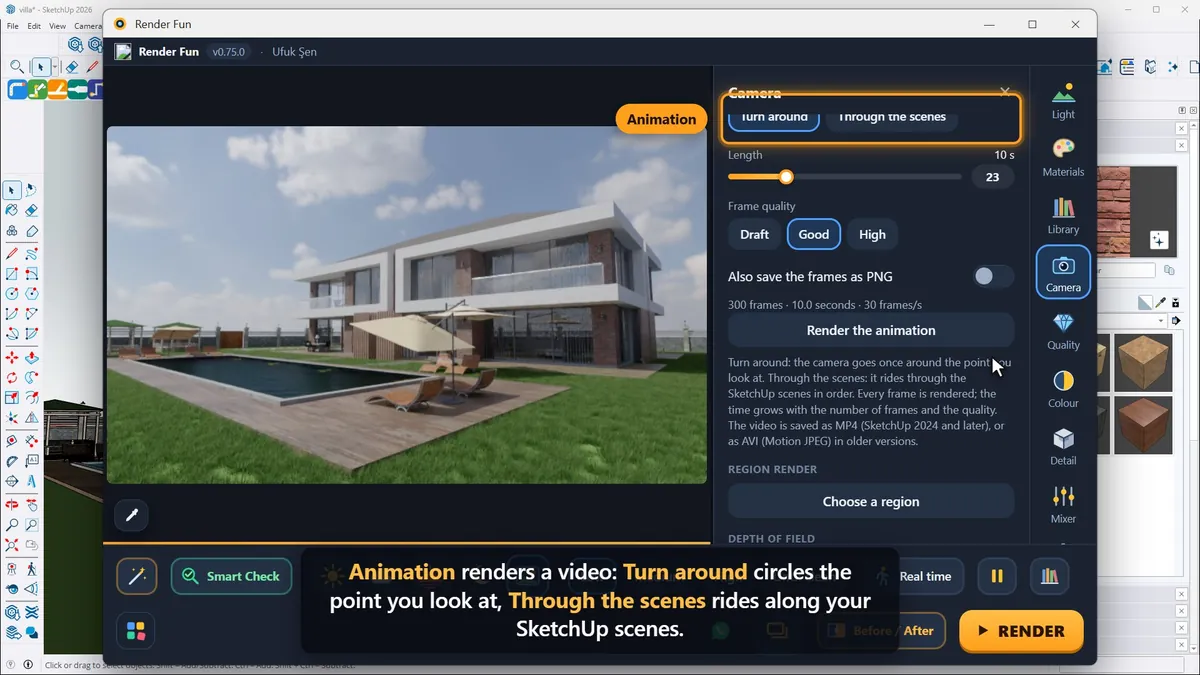
Animation renders a video: "Turn around" circles the point you look at, "Through the scenes" rides along your SketchUp scenes. Choose the length and the frame quality, then render the animation; it is saved as MP4.
Files, masks and your own settings
- In Settings, choose PNG or JPG and a transparent background for cut-out pictures.
- Render masks save extra pictures next to the render, such as material, object and depth, for quick selections in a photo editor.
- My render settings saves your whole setup under a name, so you can apply the same look in any other project; the files are kept in Documents › Render Fun › Presets and can be copied to another computer.
A simple professional workflow
- Start with Smart Check and a ready scene.
- Frame your camera and save SketchUp scenes.
- Set the sun, the HDRI and the lamps, then the materials.
- Test at Low quality and check at Medium.
- Give it the final look with colour and detail, render at High with the AI denoiser.
- Share it as a picture, a panorama or a video.
That is the whole series. Start again from lesson 1 any time, or read the best Render Fun settings.
Frequently asked questions
Can Render Fun make a virtual tour?
Yes: place tour points in the rooms and make a single HTML panorama tour.
Can I reuse my render settings in another project?
Yes: My render settings saves them under a name, and Apply brings them into any project.
- 1. Install and first render
- 2. The interface: what is where
- 3. Camera and composition
- 4. Sun, sky and HDRI
- 5. Materials
- 6. Lights and the light mixer
- 7. Quality, noise and resolution
- 8. Colour, detail and final look
- 9. Plants, water and atmosphere
- 10. Final output and workflow